Understanding Objects in JavaScript
Learn how JavaScript objects store real world data using simple key value pairs
When we begin writing programs, we usually work with simple values like numbers, strings, or arrays. These work well for many tasks, but as programs start representing real world information, we often need a better way to organize related data together.
This is where objects become extremely useful.
An object in JavaScript is a structure that stores information using key value pairs. Each piece of data is stored with a label called a key, and the value attached to that key describes something about the object.
You can think of an object like a small container that holds related information together.
For example, imagine we want to represent a person in our program. A person may have a name, age, and city. Instead of storing these values separately, we can group them inside a single object.
This makes the program easier to understand and manage.
Why Objects Are Needed
Programs often deal with entities that have multiple related properties. A student has a name, age, and course. A car has a brand, model, and year. A user account has a username, email, and password.
Objects help us store this type of structured information.
Instead of creating many unrelated variables, we can place all related values inside one object. This improves readability and keeps data organized.
Another benefit of objects is flexibility. We can easily update properties, add new ones, or remove them when needed.
Objects vs Arrays
Before creating objects, it helps to see how they differ from arrays.
An array stores values in a list where each item is accessed using an index number.
Example array
let colors = ["red", "blue", "green"]

console.log(colors[0])
Output
red
Here the value is accessed using the position inside the array.
Objects work differently. Instead of index positions, objects use keys.
Example object
let person = {
    name: "Ravi",
    age: 24,
    city: "Indore"
}

console.log(person.name)
Output
Ravi
In an object, each piece of data is accessed using the key rather than a numeric position.
This makes objects very suitable for representing real world entities.
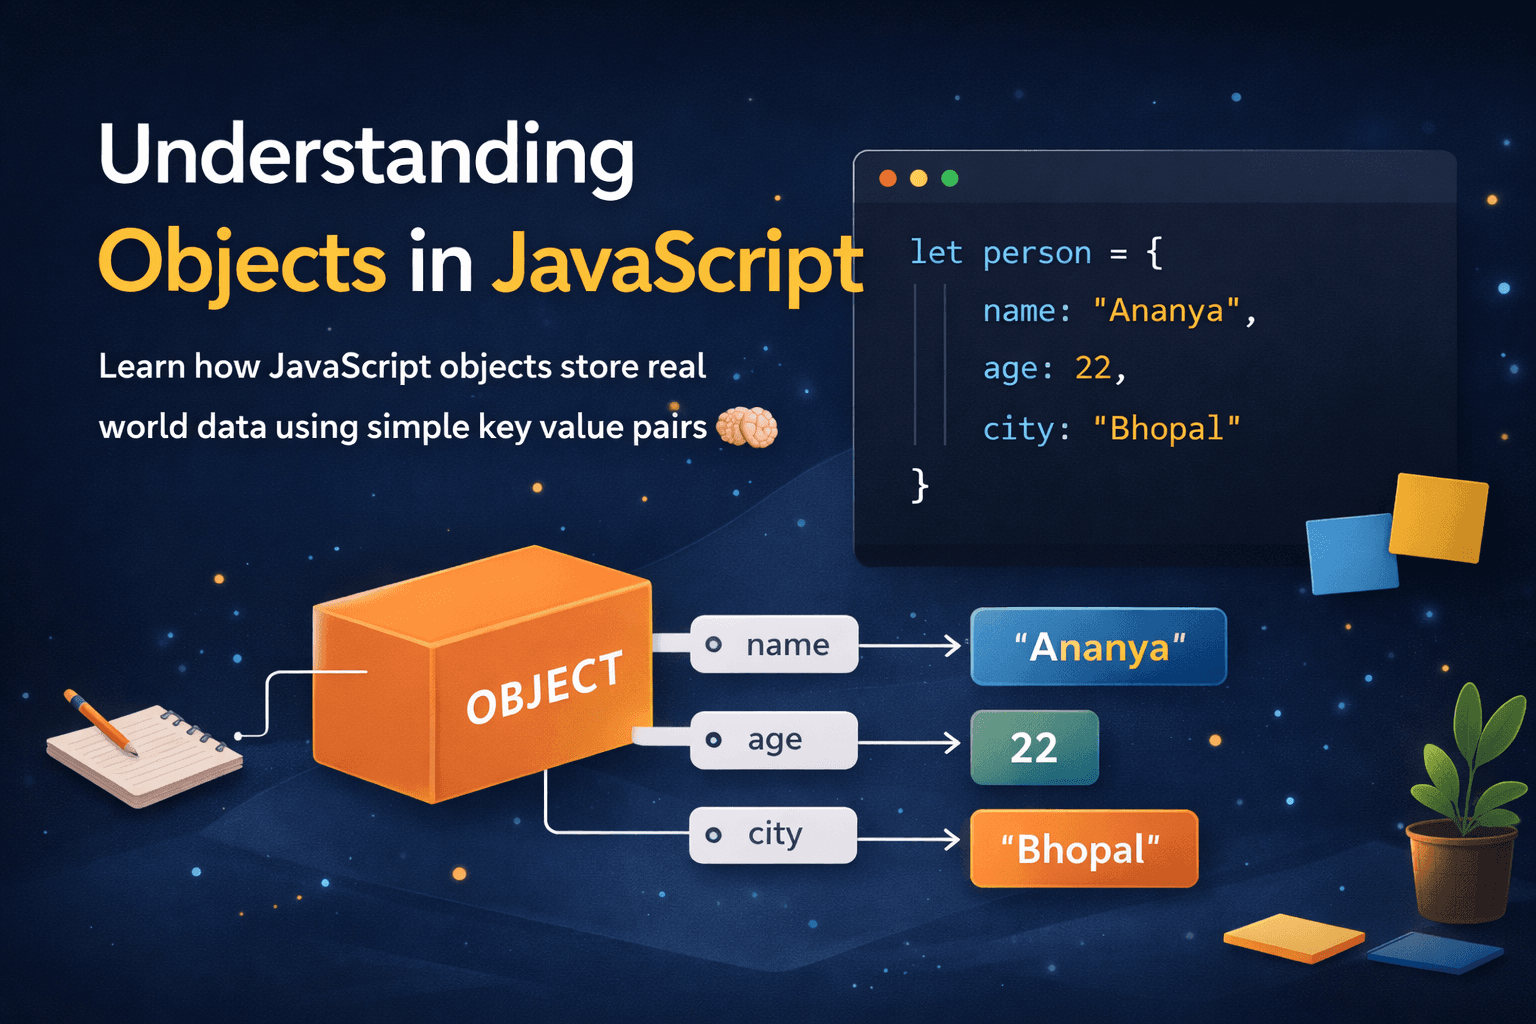
Creating Objects in JavaScript
Creating an object in JavaScript is quite simple. We define an object using curly braces and place key value pairs inside it.
Here is an example.
let person = {
    name: "Ananya",
    age: 22,
    city: "Bhopal"
}

console.log(person)
Output
{ name: 'Ananya', age: 22, city: 'Bhopal' }
In this example we created an object called person. It has three properties.
name stores the person's name
age stores the person's age
city stores the city where the person lives
Each property follows the pattern key followed by a value.
Accessing Object Properties
Once an object is created, we often need to access its properties. JavaScript provides two common ways to do this.
The first way is called dot notation.
Example
let person = {
    name: "Ananya",
    age: 22,
    city: "Bhopal"
}

console.log(person.name)
console.log(person.age)
Output
Ananya
22
Dot notation is simple and widely used when we know the property name beforehand.
The second way is called bracket notation.
Example
let person = {
    name: "Ananya",
    age: 22,
    city: "Bhopal"
}

console.log(person["city"])
Output
Bhopal
Bracket notation is useful when the property name is dynamic or stored in a variable.
Example
let property = "name"

console.log(person[property])
Output
Ananya
Both approaches achieve the same result but are useful in different situations.
Updating Object Properties
Sometimes we need to modify the values stored in an object.
Updating a property is very straightforward. We simply assign a new value to the property.
Example
let person = {
    name: "Ananya",
    age: 22,
    city: "Bhopal"
}

person.age = 23

console.log(person.age)
Output
23
Here we updated the age property from 22 to 23.
This ability to modify properties makes objects flexible and adaptable for changing data.
Adding and Deleting Properties
Objects in JavaScript are dynamic, which means new properties can be added at any time.
Example of adding a new property.
let person = {
    name: "Ananya",
    age: 22
}

person.city = "Bhopal"

console.log(person)
Output
{ name: 'Ananya', age: 22, city: 'Bhopal' }
We simply assign a new key and value to the object.
Deleting properties is also possible using the delete keyword.
Example
let person = {
    name: "Ananya",
    age: 22,
    city: "Bhopal"
}

delete person.city

console.log(person)
Output
{ name: 'Ananya', age: 22 }
The city property was removed from the object.
This flexibility allows objects to evolve as program requirements change.
Looping Through Object Keys
Sometimes we want to see every property stored in an object. JavaScript allows us to loop through object keys using a loop.
A commonly used approach is the for in loop.
Example
let person = {
    name: "Ananya",
    age: 22,
    city: "Bhopal"
}

for (let key in person) {
    console.log(key + " : " + person[key])
}
Output
name : Ananya
age : 22
city : Bhopal
The loop runs through every key in the object. Using the key we can access its corresponding value.
This is very helpful when working with objects that contain many properties.
A Small Practice Exercise
To become comfortable with objects, try creating one yourself.
Create an object representing a student and include properties such as name, age, and course.
Example solution
let student = {
    name: "Arjun",
    age: 20,
    course: "Computer Science"
}

student.age = 21

for (let key in student) {
    console.log(key + " : " + student[key])
}
Output
name : Arjun
age : 21
course : Computer Science
First the object was created with three properties. Then the age property was updated. Finally we used a loop to print all keys and values.
Exercises like this help in understanding how objects store and organize information.
Objects are one of the most important structures in JavaScript. They allow programs to represent real world entities in a clean and organized way. As you continue learning JavaScript, you will see objects used everywhere from simple applications to complex systems.
Once you become comfortable with creating and manipulating objects, writing structured and readable programs becomes much easier.
I hope this blog gave you the necessary insights into the objects in JavaScript.